Trang

Thứ Tư, 24 tháng 8, 2011

         MÃ TEXT BOX PHÂN LẬP ĐƯỢC CỦA CỤ BIINQL
Cuối cùng thì mã tạo texbox có màu và viền là:
<div style="width: 277px; height: 116 px; float: left;"><table style="border: 1px solid rgb(234, 234, 234);" border="0" cellSpacing="1" cellPadding="0" bgColor="#bfbfbf" align="left"><tbody><tr><td bgColor="#ffffff" align="center">

Còn texbox ảo không đường kẻ không màu:
<style="width: 277px; height: 116px; float: left;">
                                                    

MÃ CHÚ TIỂU GÕ MÕ KHÔNG LỜI BÌNH

<blockquote style="margin-right: 0px;" dir="ltr"> <div style="width: 164px; height: 144px; float: left;"><p><a href="http://s1086.photobucket.com/albums/j446/hadangtin/?action=view&amp;current=HC50.gif" target="_blank"><img border="0" alt="Photobucket" src="http://i1086.photobucket.com/albums/j446/hadangtin/HC50.gif"></a></p></div> </blockquote>
<p>&nbsp;</p><p><a href="http://s1086.photobucket.com/albums/j446/hadangtin/?action=view&amp;current=HC50.gif" target="_blank"></a></p>

Thơ của Cà Na
Chị ơi , sinh nhật tổ chức không ?
Theo Na , thôi dẹp, đỡ tốn công
Chị mời, không đi thì ngại quá
Nhưng mà không lẽ đến tay không ?

Từ nay chỉ biết đi rình
Thơ ai thả lỏng
Quyết Rinh về nhà

Töø nay chæ bieát ñi rình
Thô ai thaû loûng
Quyeát Rinh veà nhaø

MÃ MÈO Ô TÔ CÓ LỜI BÌNH
<blockquote style="margin-right: 0px;" dir="ltr"> <div style="width: 267px; height: 180px; float: left;"><a href="http://s1086.photobucket.com/albums/j446/hadangtin/Anh%20dong%20Hung/?action=view&amp;current=MeoHCoto.gif" target="_blank"><img style="width: 233px; height: 147px;" border="0" alt="Photobucket" src="http://i1086.photobucket.com/albums/j446/hadangtin/Anh%20dong%20Hung/MeoHCoto.gif" width="254" height="132"></a></div><p><span style="font-size: 12pt;"><font color="#0000ff" face="Times New Roman"><strong>LỜI BÌNH</p><p>&nbsp;</p></blockquote><a href="http://s1086.photobucket.com/albums/j446/hadangtin/Anh%20dong%20Hung/?action=view&amp;current=MeoHCoto.gif" target="_blank"></a>

Mã mèo đánh răng và lời bình

<blockquote style="margin-right: 0px;" dir="ltr"><div style="width: 255px; height: 203px; float: left;"><a href="http://s1086.photobucket.com/albums/j446/hadangtin/?action=view&amp;current=MeoHC.gif" target="_blank"><img style="width: 183px; height: 166px;" border="0" alt="Photobucket" src="http://i1086.photobucket.com/albums/j446/hadangtin/MeoHC.gif" width="215" height="230"></a></div></blockquote><strong><font color="#a040ff">LỜI BÌNH</font></strong><a href="http://s1086.photobucket.com/albums/j446/hadangtin/?action=view&amp;current=MeoHC.gif" target="_blank"></a>

MÃ THẰNG CHÓ CÚN VÀ LỜI BÌNH
<blockquote style="margin-right: 0px;" dir="ltr"><div style="width: 215px; height: 138px; float: left;"><a href="http://www.picground.com/"><img style="width: 148px; height: 127px;" border="0" alt="Upload" src="http://img1.imagehousing.com/1/8716ebf90d0e301240a86f675e723b77.gif" width="397" height="259"></a></div><strong><br><br>LỜI BÌNH<br></strong></blockquote>

MÃ MỘT SỐ ẢNH ĐỘNG DÁN VỚI LỜI BÌNH
1.      texbox ảo không đường kẻ không màu:

<style="width: 277px; height: 116px; float: left;">
2. Mã text box chứa ảnh dịch đi một khoảng sang phải
<blockquote style="margin-right: 0px;" dir="ltr"><div style="width: 277px; height: 116px; float: left;"></div></blockquote>

3. Mã của ảnh động có text box với comment

Lưu ý khi sử dụng chỉ copy mã thôi, hình là ví dụ không copy
MÃ CHÚ TIỂU GÕ MÕ KHÔNG LỜI BÌNH
<blockquote style="margin-right: 0px;" dir="ltr"> <div style="width: 164px; height: 144px; float: left;"><p><a href="http://s1086.photobucket.com/albums/j446/hadangtin/?action=view&amp;current=HC50.gif" target="_blank"><img border="0" alt="Photobucket" src="http://i1086.photobucket.com/albums/j446/hadangtin/HC50.gif"></a></p></div></blockquote><p>&nbsp;</p><p><a href="http://s1086.photobucket.com/albums/j446/hadangtin/?action=view&amp;current=HC50.gif" target="_blank"></a></p> ...
LỜI BÌNH
Photobucket
MÃ MÈO Ô TÔ CÓ LỜI BÌNH
<blockquote style="margin-right: 0px;" dir="ltr"> <div style="width: 267px; height: 180px; float: left;"><a href="http://s1086.photobucket.com/albums/j446/hadangtin/Anh%20dong%20Hung/?action=view&amp;current=MeoHCoto.gif" target="_blank"><img style="width: 233px; height: 147px;" border="0" alt="Photobucket" src="http://i1086.photobucket.com/albums/j446/hadangtin/Anh%20dong%20Hung/MeoHCoto.gif" width="254" height="132"></a></div><p><span style="font-size: 12pt;"><font color="#0000ff" face="Times New Roman"><strong>LỜI BÌNH</p><p>&nbsp;</p></blockquote><a href="http://s1086.photobucket.com/albums/j446/hadangtin/Anh%20dong%20Hung/?action=view&amp;current=MeoHCoto.gif"target="_blank"></a>

Photobucket
MÃ MÈO ĐÁNH RĂNG VÀ LỜI BÌNH
<blockquote style="margin-right: 0px;" dir="ltr"><div style="width: 255px; height: 203px; float: left;"><a href="http://s1086.photobucket.com/albums/j446/hadangtin/?action=view&amp;current=MeoHC.gif" target="_blank"><img style="width: 183px; height: 166px;" border="0" alt="Photobucket" src="http://i1086.photobucket.com/albums/j446/hadangtin/MeoHC.gif" width="215" height="230"></a></div></blockquote><strong><font color="#a040ff">LỜI BÌNH</font></strong><a href="http://s1086.photobucket.com/albums/j446/hadangtin/?action=view&amp;current=MeoHC.gif" target="_blank"></a>
Photobucket
MÃ THẰNG CHÓ CÚN VÀ LỜI BÌNH
<blockquote style="margin-right: 0px;" dir="ltr"><div style="width: 215px; height: 138px; float: ri;"><a href="http://www.picground.com/"><img style="width: 148px; height: 127px;" border="0" alt="Upload" src="http://img1.imagehousing.com/1/8716ebf90d0e301240a86f675e723b77.gif" width="397" height="259"></a></div><strong><br><br>LỜI BÌNH<br></strong></blockquote>
Upload
MÃ NGỌN NẾN TIẾN HOÀN VÀ LỜI BÌNH
<div class="bd"><blockquote><div style="width: 276px; height: 143px; float: left;"><div><p align="center"><a href="http://s248.photobucket.com/albums/gg171/Hoan_letien/?action=view&amp;current=lt231.gif" target="_blank"><img border="0" alt="Photobucket" src="http://i248.photobucket.com/albums/gg171/Hoan_letien/lt231.gif"> </a></p></div></div>LỜI BÌNH (Ghi đè lên chữ lời bình để viết lời bình của mình)</blockquote></div><p class="comment-reply"><span class="date"></span>&nbsp;</p>
Photobucket
MÃ CON THỎ CÁM ƠN TIẾNG VIỆT TRẢ LỜI LỜI BÌNH
<blockquote style="margin-right: 0px;" dir="ltr"><div style="width: 215px; height: 204px; float: right;"><p align="center"><a href="http://s1086.photobucket.com/albums/j446/hadangtin/?action=view&amp;current=Camon-AA.gif" target="_blank"><img style="width: 138px; height: 155px;" border="0" alt="Photobucket" src="http://i1086.photobucket.com/albums/j446/hadangtin/Camon-AA.gif" width="144" height="168"></a></p></div><strong>LỜI BÌNH<br><br><div class="bd"><p align="center"><a href="http://s1086.photobucket.com/albums/j446/hadangtin/?action=view&amp;current=Camon-AA.gif" target="_blank"></a></p></div></strong></blockquote>
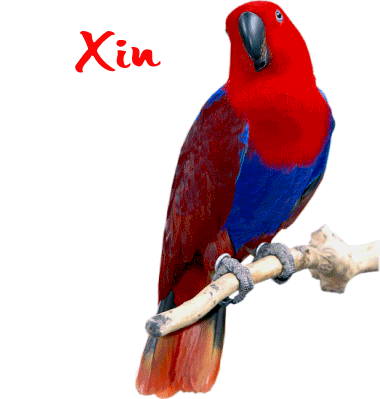
Photobucket
MÃ CON VẸT XIN CHÀO
<blockquote style="margin-right: 0px;" dir="ltr"><div style="width: 273px; height: 211px; float: left;"><p>&nbsp;&nbsp;&nbsp;&nbsp;&nbsp;&nbsp;&nbsp;&nbsp;&nbsp;&nbsp;&nbsp;&nbsp;&nbsp; <a href="http://s1086.photobucket.com/albums/j446/hadangtin/?action=view&amp;current=VET.gif" target="_blank"><img style="width: 152px; height: 173px;" border="0" alt="Photobucket" src="http://i1086.photobucket.com/albums/j446/hadangtin/VET.gif" width="163" height="210"></a></p></div></blockquote>
<p>&nbsp;</p><p><font color="#0000bf" size="6">Xin chào !</font></p>
Photobucket
                      MÃ CÔ GÁI VÀ VÒI NƯỚC CÂN PHẢI
<blockquote style="margin-right: 0px;" dir="ltr"><div style="width: 288px; height: 191px; float: right;">&nbsp;&nbsp;&nbsp;&nbsp;&nbsp;&nbsp;&nbsp;&nbsp; <a href="http://www.picground.com/"><img style="width: 214px; height: 168px;" border="0" alt="Upload" src="http://img1.imagehousing.com/1/7b03c161b9339a901afb013025a3760a.gif" width="230" height="262"></a></div><div><span style="font-size: 14pt;"><strong><font color="#a040ff" face="Arial,Helvetica,sans-serif">BÌNH LUẬN<div>&nbsp;</div></font></strong></span></div></blockquote>


Upload

MÃ CON MÈO CON CHUỘT CÓ LỜI BÌNH CỦA CỤ NGUYỆT ÁNH
<div style="width: 318px; height: 277px; float: left;"><table style="border: 0px solid rgb(234, 234, 234); width: 276px; height: 251px;" border="0" cellSpacing="1" cellPadding="0" align="left"><tbody><tr><td bgColor="#efd3f0" align="middle"><img style="width: 277px; height: 233px;" src="http://img1.imagehousing.com/10/da5602593bf8abc0cd71dd91d646fe80.gif" width="294" height="222"></td></tr><tr></tr></tbody></table></div><p><font color="#0000bf" size="5">
LỜI BÌNH</font></p>
BẢNG MÃ CÓ ẢNH KÈM PHẦN GIỚI THIỆU DƯỚI ẢNH (THUYẾT MINH ẢNH) CỦA CỤ NGUYỆT ÁNH
Bảng mã có phần giới thiệu ảnh phía dưới.< P>TIÊU ĐỀ </P> <DIV style="FLOAT: left"> < TABLE style="BORDER-BOTTOM: rgb(234,234,234) 1px solid; BORDER-LEFT: rgb(234,234,234) 1px solid; BORDER-TOP: rgb(234,234,234) 1px solid; BORDER-RIGHT: rgb(234,234,234) 1px solid" border=0 cellSpacing=1 cellPadding=0 align=left> < TBODY><TR><TD bgColor=#efd3f0 align=middle><IMG src="LINK ÀNH" width=294></TD></TR> < TR><center><TD>Giới thiệu ảnh</TD></center></TR></TBODY></TABLE></DIV> < P>Nội dung </P>
LƯU Ý: TÔI TRÌNH BÀY MÃ VÀ HÌNH MẪU ĐỂ CÁC CỤ CÁC BẠN XEM CHO BIẾT MÃ NÀY SẼ RA HÌNH THẾ NÀY ... THÔI, CỤ NÀO THÍCH DÙNG THÌ NÊN COPY CẢ BÀI NÀY VỀ WORD ĐỂ KHI DÙNG MỞ RA DẾ DÀNG. COPY DÁN VÀO WORD THÌ ẢNH ĐỘNG KHÔNG ĐỘNG NỮA NHƯNG MÃ CỦA NÓ KHÔNG ẢNH HƯỞNG. COPY MÃ TỪ WORD DÁN VÀO BLOG RẤT TIỆN LỢI.
Mã cụ Ánh: Phải xóa bgcolor =”#0” đi thì mới trong suốt, nếu để thế thì nền màu đen. Thừa đoạn mã này khi lấy mã ở Photobucket.com

<img src="<a href=" target="_blank" ?action='view&amp;current=Hoachucmung.gif"' hadangtin="" j446="" albums="" s1086.photobucket.com="">

&nbsp;&nbsp;&nbsp;&nbsp;&nbsp;&nbsp;&nbsp;&nbsp;&nbsp;

Mã lấy ảnh ở hai đường khác nhau chữ th = thumbnail

<a href="http://img707.imageshack.us/i/btk32011.jpg/" target="_blank"><img src="http://img707.imageshack.us/img707/6701/btk32011.jpg" alt="Free Image Hosting at www.ImageShack.us" border="0"/></a>

<a href="http://img707.imageshack.us/i/btk32011.jpg/" target="_blank"><img src="http://img707.imageshack.us/img707/6701/btk32011.th.jpg" alt="Free Image Hosting at www.ImageShack.us" border="0"/></a>

Mã trả lời song thu bình thơ song thu


                                          MÃ CÔ GÁI CÁM ƠN KHÔNG CÓ TEXT BOX
<a href="http://s1086.photobucket.com/albums/j446/hadangtin/?action=view&amp;current=cam-on-2.gif" target="_blank"><img src="http://i1086.photobucket.com/albums/j446/hadangtin/cam-on-2.gif" border="0" alt="Photobucket"></a>

                                             MÃ CÔ GÁI ÔM MÈO CÁM ƠN
<blockquote style="margin-right: 0px;" dir="ltr"><div style="width: 198px; height: 185px; float: left;"><a href="http://s1086.photobucket.com/albums/j446/hadangtin/?action=view&amp;current=cam-on-2.gif" target="_blank"><img style="width: 164px; height: 173px;" border="0" alt="Photobucket" src="http://i1086.photobucket.com/albums/j446/hadangtin/cam-on-2.gif" width="154" height="173"></a></div>LỜI BÌNH&nbsp;(TRẢ LỜI)</blockquote><a href="http://s1086.photobucket.com/albums/j446/hadangtin/?action=view&amp;current=cam-on-2.gif" target="_blank"></a>
                                                                         Photobucket

MÃ CON VẸT XANH XIN CHÀO
<blockquote style="margin-right: 0px;" dir="ltr"><div style="width: 195px; height: 211px; float: left;">&nbsp;<a href="http://s1086.photobucket.com/albums/j446/hadangtin/?action=view&amp;current=Vetxanh01.gif" target="_blank"><img style="width: 146px; height: 192px;" border="0" alt="Photobucket" src="http://i1086.photobucket.com/albums/j446/hadangtin/Vetxanh01.gif" width="169" height="228"></a></div><p>NHÂN ĐỌC BÀI <strong>"Một lần ở ngã ba Đồng Lộc"</strong>&nbsp; TẶNG HẠT CÁT</p><p>Bữa trước em chê vẹt đỏ.<br>Vào rừng anh kiếm vẹt xanh<br>Dạy cho nói năng chào hỏi<br>Lại đem dâng lên Cát lành&nbsp;<br><br>Cát không phải là cát<br>mà là điều <strong>lành tốt</strong> cho đời.<br>Thơ văn dạt dào vô tận<br>Bài nào cũng thắm đậm tình người</p><p>&nbsp;</p></blockquote>
Photobucket
Mã ảnh 3 ngọn nến
<a href="http://www.gifzona.com/" target="_blank"><img style="width: 157px; height: 186px;" title="www.gifzona.com" border="0" src="http://xxlsite.narod.ru/i/candel/02.gif" width="184" height="222"></a><br>
MÃ BA NGỌN NẾN VỚI LỜI CHÚ GIẢI ẢNH
<blockquote style="margin-right: 0px;" dir="ltr"><div style="width: 195px; height: 211px; float: left;">&nbsp;<a href="http://www.gifzona.com/" target="_blank"><img style="width: 157px; height: 186px;" title="www.gifzona.com" border="0" src="http://xxlsite.narod.ru/i/candel/02.gif" width="184" height="222"></a><br>LỜI CHÚ GIẢI ẢNH</a></div></blockquote>
MÃ BA NGỌN NẾN VỚI LỜI BÌNH
<blockquote style="margin-right: 0px;" dir="ltr"><div style="width: 195px; height: 211px; float: left;">&nbsp;<a href="http://www.gifzona.com/" target="_blank"><img style="width: 157px; height: 186px;" title="www.gifzona.com" border="0" src="http://xxlsite.narod.ru/i/candel/02.gif" width="184" height="222"></a><br></div><p><strong>LỜI BÌNH</strong></p></blockquote>


MÃ BÓ HOA CHÚC MỪNG
<div class="bd"><p><span style="font-family: Arial;"><a href="http://s1086.photobucket.com/albums/j446/hadangtin/?action=view&amp;current=Hoachucmung.gif" target="_blank"><img style="width: 197px; height: 175px;" border="0" alt="Photobucket" src="http://i1086.photobucket.com/albums/j446/hadangtin/Hoachucmung.gif" width="193" height="176"></a></span></p></div>
                                                   Photobucket
                                          MÃ TẠO CHỮ CHO ẢNH ĐỘNG FLASH

<p align=”center”><embed allowscriptaccess=”never” src=”link của Flach” flashvars=”&amp;go=Noi dung entry” wmode=”transparent” width=”530 height=700></p>
<p align=”center”><embed allowscriptaccess=”never” src="http://w1086.photobucket.com/flash/tagWidget.swf?mediaURL=aHR0cDovL2kxMDg2LnBob3RvYnVja2V0LmNvbS9hbGJ1bXMvajQ0Ni9oYWRhbmd0aW4vQmlCVDI2QXMtMS5naWY%3D" width="250" height="350"/></td></tr></table>” flashvars=”&amp;go=Bài viết wmode=”transparent” width=”530 height=700></p>


<font color="#bf00bf" size="5"><br></font><span style="color: blue;"><p align="center">
<script>objtag="\u003c embed AllowScriptAccess=\u0027never\u0027  height=\u0022700\u0022 type=\u0022application/x-shockwave-flash\u0022 width=\u0022530\u0022 src=\u0022http://i537.photobucket.com/albums/ff336/dachih/2wu-2/2801.swf\u0022 wmode=\u0022transparent\u0022 flashvars=\u0022&amp;go= &#10;HOA TULIP &#10; L&#x001edd;i t&#x001ecf; b&#xe0;y c&#x001ee7;a t&#xec;nh y&#xea;u &#10;- Hoa Tulip v&#xe0;ng: T&#xec;nh y&#xea;u v&#xf4; v&#x001ecd;ng - Hoa Tulip M&#xe0;u &#x000111;&#x001ecf; : Tuy&#xea;n ng&#xf4;n c&#x001ee7;a t&#xec;nh y&#xea;u - Hoa Tulip L&#x001ed1;m &#x000111;&#x001ed1;m nhi&#x001ec1;u m&#xe0;u : &#x000110;&#xf4;i m&#x001eaf;t &#x000111;&#x001eb9;p - Hoa Tulip M&#xe0;u v&#xe0;ng : T&#xec;nh tuy&#x001ec7;t v&#x001ecd;ng&#10;&#x000110;&#x0001b0;&#x001ee3;c b&#x001ea3;o v&#x001ec7; trong v&#xf2;ng &#xf4;m th&#xe2;n &#xe1;i&#10;C&#x001ee7;a b&#x001ee9;c t&#x0001b0;&#x001edd;ng &#x000111;&#x001ecf; c&#x000169; r&#x001ea5;t nghi&#xea;m minh&#10;Hoa x&#x001ebf;p &#x000111;&#x001ed9;i h&#xec;nh nh&#x0001b0; l&#xed;nh b&#x001ed9; binh&#10;Di&#x001ec5;u h&#xe0;nh d&#x0001b0;&#x001edb;i &#xe1;nh m&#x001eb7;t tr&#x001edd;i ch&#xe2;n l&#xfd;.\u0022\u003e";if (DetectFlashVer(10,0,22) || (!DetectFlashVer(10,0,0) && DetectFlashVer(9,0,159))) document.writeln(objtag); else document.writeln(playerupgrade);</script>
<embed height="700" type="application/x-shockwave-flash" width="530" src="http://i537.photobucket.com/albums/ff336/dachih/2wu-2/2801.swf" AllowScriptAccess="never" wmode="transparent" flashvars="&amp;go= &#10;HOA TULIP &#10; Lời tỏ bày của tình yêu &#10;- Hoa Tulip vàng: Tình yêu vô vọng - Hoa Tulip Màu đỏ : Tuyên ngôn của tình yêu - Hoa Tulip Lốm đốm nhiều màu : Đôi mắt đẹp - Hoa Tulip Màu vàng : Tình tuyệt vọng&#10;Được bảo vệ trong vòng ôm thân ái&#10;Của bức tường đỏ cũ rất nghiêm minh&#10;Hoa xếp đội hình như lính bộ binh&#10;Diễu hành dưới ánh mặt trời chân lý."></p><p><a href="http://hoangnguyen6889.vnweblogs.com/gallery/2434/%C4%90%C3%B4i%20m%C6%B0a%20%C4%91%C3%AAm%20P%C3%AAeTN%C3%AAet.jpg"></a></p></span>


<p align="center"><embed allowscriptaccess="never" src="http://i537.photobucket.com/albums/ff336/dachih/2wu-2/2801.swf
" flashvars="&amp;go=Nội dung entry" wmode="transparent" width="530" height="700"></p>

Thứ Hai, 22 tháng 8, 2011

Thơ của Hạt Cát Mây Tương Tư

                                                          Thơ của Hạt Cát  Mây Tương Tư
Photobucket

Thứ Sáu, 12 tháng 8, 2011

ĐƯA THỤC OANH LÊN CHÙA


Cựu học sinh 10 e bạn học của Thục Oanh vào viếng bạn


Chùa Kim Liên Quận Tây Hồ nơi đưa Thục Oanh lên


Gia đình và bạn bè dự lễ cầu siêu cho bạn Thục Oanh 35 ngày (10.08.2011)


THƠ CỦA HẠT CÁT: THU

Thu 秋 Đăng ngày: 15:02 11-08-2011               hat cat

秋月如清玉
秋凤象琴声
秋影形睡柳

秋情发萌萌


dịch âm
Thu nguỵêt như thanh ngọc
Thu phong tượng cầm thanh
Thu ảnh hình thùy liễu
Thu tình phát manh manh

dịch thơ
Trăng thu trong như ngọc
Gió thu ngân tiếng đàn
Dáng thu tha thướt liễu
Tình thu dâng mênh mang
Bài này dể cảm tạ Bloger Nói Liều - người đã cài cho Cat phông chữ TQ, lại biết Cat lười nên cài sẵn mã đặt ảnh, và còn dạy Cat nhiều thứ nữa... Cat không có biết làm chữ thơ Hán, bây giờ Cat liều viết vài câu về mùa thu, coi như đây là BÀI KIỂM TRA kiến thức thày ạ!

Thứ Năm, 11 tháng 8, 2011

                           KÍNH GỬI BÁC TÁM RÂU BẠC
  Nói chuyện "khóa" CHẲNG PHẢI nói chơi
        Tôi sang blogspot thấy tuyệt vời
Tải ảnh tải bài đều nhanh nhẹn
Khả năng hơn hẳn Yahoo rồi.

Nói chuyện "khóa" là nói cho vui
Bác vào thăm vườn tược nhà tôi
Cửa mở thênh thang mời khách đến
Có nhị xà ngâm rượu để bác sơi


Tôi nay tuổi tác hơi bị già
Bạn bè giao kết khắp gần xa
Tuổi tác hơn thua không quan trọng.
Mong tình cảm chân thành ta với ta.


Photobucket
KÍNH GỬI BÁC TÁM RÂU BẠC
Ôi ôi ôi mất cảnh giác rồi
Thế này thật là tội thân tôi
Đang nghĩ gmail và blogspot
Bác Tám khen lao chằng đôi hồi


Thực tình thơ tôi chẳng ra sao
Phải đi học khắp Việt Miên Lào
Mà tài năng thì tôi chẳng có
Bác chớ khen tôi, tổn âm hao.


NÓI CHUYỆN VỚI BÁC TÁM RÂU BẠC
Không biết bác hỏi đùa hay không biết thật. Khoản này tôi ú ớ Việt gian lắm, nhưng cũng loạn bàn thế này: Theo tôi phải nói là "Tán truyện" mới đúng. Từ Tám chuyện lần đầu tiên tôi được nghe ở bác đấy. Có lẽ mấy ông trong nớ hay nói ngọng rồi bịa ra chăng? "Tán" là âm Hán Việt của một từ Hán 贊 (zan 讚) có nghĩa là "góp vào, giúp, cổ súy, phụ họa...". Vd. như tán thành, tham tán... Việc ghép một từ hán (tán) với một từ Việt (chuyện) chắc là bắt nguồn từ tán truyện (朁 傳) có nghĩa là phụ họa vào câu chuyện, góp vào câu chuyện... Loạn bàn như vậy nhưng nói khẽ thôi, các bậc túc nho biết cười cho đấy. Cần gì để tôi đi hỏi bà bạn của blogger Hat Cat là người am hiểu nhiều chắc chắn nói không sai. Chúc bác bình an + khoái lạc = An lạc.


VUI CÙNG HẠT CÁT - BLOGGER 360PLUS


Photobucket

Thứ Tư, 10 tháng 8, 2011

BÀI THƠ HẬU HẬU THỜI CON KHỈ

BÀI THƠ HẬU HẬU THỜI CON KHỈ
KHÓA MẠNG THÔI
Photobucket
KHÓA MẠNG THÔI
Thôi thì khóa mạng, khóa mạng thôi!
Bà kêu, cháu khóc đã lâu rồi
Học thơ Hạt Cát – Thơ con cóc
Tập làm ảnh động – Ảnh đen thui
Mục lục Ngọc Trâm đăng chẳng đặng

Họa thơ Tulip nối vào nồi
Quyến luyến tình ai trong mộng ảo
Không tàn thì cũng tán gia rồi.
II
Tôi đành khóa mạng, khóa mạng tôi!
Bà kêu, cháu khóc đã lâu rồi.
Học thơ Hạt Cát – Thơ con cóc
Tập làm ảnh động – Ảnh đen thui
Mục lục Ngọc Trâm đăng chẳng đặng

Họa thơ Tulip nối vào nồi
Quyến luyến tình ai trong mộng ảoK
hông tan thì cũng tán tàn thôi.
1) Học Hạt Cát làm thơ, chỉ làm được thơ con cóc thôi
2) Cụ Thanh Mai còn có nickname và blog là TULIP

Thứ Ba, 9 tháng 8, 2011

LÀM SLIDE SHOW BẰNG PRESENTATIONS

HOW TO CREATE SLIDE SHOW WITH PRESENTATIONS

Self-running presentations are a great way to communicate information without having to have someone available to run a slide show presentation. For example, you might want to set up a presentation to run unattended in a booth or kiosk at a trade show or convention, or send a CD with a self-running slide show to a client.
You can make most controls unavailable so that users can't make changes to the presentation. A self-running presentation restarts when it has finished and also when it has been idle on a manually advanced slide for longer than five minutes.
Interactive options for a self-running presentation
When designing a self-running presentation, you'll want to keep the environment in mind — for example, whether the booth or kiosk will be in an unmonitored public place or whether supervision will be available. The answer will help you determine what elements you add to your presentation, how much control you give users, and what steps you need to take to prevent misuse.
Options you might want to consider when designing a self-running presentation include:
Automatic or manual timings You can set up a presentation to run by itself with automatic timings, or you can set it so that users can move through it at their own pace by using the mouse to click action buttons for navigation. If you set up a slide show to be browsed at a kiosk, mouse clicks are ignored unless they're on objects with hyperlinks or action buttons.
Hyperlinks and Action buttons You can use hyperlinks to move through the presentation or to jump to other slides and programs. Action buttons (PowerPoint's predefined navigation buttons) can give your presentation the look and familiarity of a Web page, with buttons for Home, Help, Back, Next, and so on.
Voice narration You can add recorded narration that plays with your presentation.
Capture user input You can use the ActiveX controls that come with PowerPoint to create a response slide in your presentation. For example, you can add a text box in which people can enter their names and addresses to receive further information. For more information, see Become a feedback guru using ActiveX controls.
Setting and rehearsing slide show timings
You can set timings for your slides manually, or you can set them automatically while you rehearse.
To set timings manually
You can set the exact amount of time each slide is viewed—for example, you can have the title slide appear for 10 seconds, the second slide for 2 minutes, the third for 45 seconds, and so on. You may find it easiest to work with the Slides tab selected in Normal View, so you can see miniatures of each slide in your presentation.
1. Select the slide you want to apply the timing to.
2. On the Slide Show menu, click Slide Transition.
3. Under Advance slide, select the Automatically after check box, and then enter the number of seconds you want the slide to appear on the screen.
NOTE If you want the next slide to appear either when you click the mouse or automatically after the number of seconds you enter — whichever comes first — select both the On mouse click and the Automatically after check boxes. If you use this option, be sure to also set the show type as presented by a speaker. On the Slide Show menu, click Set Up Show, and then under Show type, click Presented by a speaker (full screen). Mouse clicks are ignored if the slide show is set up to be browsed at a kiosk or browsed by an individual.
4. To set the same timing for all slides in your slide show, click Apply to All Slides
To set timings automatically
To set timings automatically while you rehearse, you can use the buttons in the Rehearsal dialog box to pause between slides, restart a slide, and advance to the next slide. As you rehearse the presentation, PowerPoint tracks how long each slide appears and sets the timing accordingly. If you display the same slide more than once — for example, in a custom show — the last timing is the one PowerPoint records.

Advance to next slide
Pause timing
Slide timing (editable)
Repeat
Total time for presentation
1. On the Slide Show menu, click Rehearse Timings.
Your slide show opens in rehearsal mode and the slide timing starts.
2. When you're ready to advance to the next slide, click Next.
If you're not satisfied with the time or want to try again, click Repeat to start the clock over at 0:00:00.
If you want to pause the clock, click Pause.
3. Repeat step 2 for each slide in the presentation.
4. After you set the time for the last slide, a message box appears displaying the total time for the slide show and asking if you want to keep these timings for your slide show. Click Yes.
Adding navigation
You might want to allow the person viewing your presentation to navigate by using hyperlinks or action buttons.
Hyperlinks You can add a hyperlink to your presentation and then use it to go to a variety of locations — for example, a custom show, a specific slide within the presentation, a different presentation altogether, a Microsoft Word document or Microsoft Excel spreadsheet, or an Internet, intranet, or e-mail address. You can create a hyperlink from any object — including text, shapes, tables, graphs, and pictures. For information, see the Help topic Create a hyperlink.
Action buttons PowerPoint comes with some ready-made action buttons that you can insert in your presentation and define hyperlinks for. Action buttons contain shapes, such as right and left arrows. Use them when you want to include commonly understood symbols for going to next, previous, first, and last slides. PowerPoint also has action buttons for playing movies or sounds. For information, see the Help topic Insert an action button.
Setting up a slide show to run at a kiosk
Setting up a slide show to run at a kiosk allows you to control whether mouse clicks anywhere on the screen advance the slide. For example, if you want the slide show to be viewed at a specific pace, set automatic timings and then set the slide show to run at a kiosk. To give users additional control, you can add navigation, such as hyperlinks or action buttons, to your slides.
1. On the Slide Show menu, click Set Up Show.
2. Under Show type, click Browsed at a kiosk (full screen).
NOTE If you set up a slide show to run at a kiosk, remember to also add automatic timings or navigation hyperlinks or action buttons. Otherwise, the slide show will show only the first slide.
Adding narratives
Self-running presentations sometimes need to convey more information than a presentation given by a speaker, where the audience can interact with the presenter. Adding a narrative, either with voice narration or with slide notes, can help deliver more information in your self-running presentation.
Voice narration
To record a narration, your desktop computer needs a sound card and a microphone and microphone connector. A laptop computer just needs a microphone and microphone connector. You can record a narration before you run a presentation, or you can record it during the presentation and include audience comments. If you don't want narration throughout the entire slide show presentation, you can also record separate sounds or comments on selected slides or objects. For information, see the Help topic Record a voice narration.
Saving your presentation as a slide show
Saving your PowerPoint presentation as a slide show ensures that when the file is opened, it automatically opens as a slide show (in full screen mode).
1. On the File menu, click Save As.
2. In the Save as type box, select PowerPoint Show (*.pps), and then click Save.
Packaging your presentation to run on another computer

Create a custom show
1. On the Slide Show menu, click Custom Shows, and then click New.
2. Do one of the following:
Create a custom show
1. Under Slides in presentation, select the slides you want to include in the custom show, and then click Add.
To select multiple slides, hold down CTRL as you click the slides.
2. To change the order in which slides appear, select a slide under Slides in custom show, and then click one of the arrows to move the slide up or down in the list.
3. Type a name in the Slide show name box, and then click OK.
4. Repeat steps 1 through 3 to create more custom shows with any slides in your presentation.
Create a hyperlinked custom show
1. Under Slides in presentation, select the slides you want to include in the main custom show, and then click Add.
To select multiple slides, hold down CTRL as you click the slides.
2. To change the order in which slides appear, select a slide under Slides in custom show, and then click one of the arrows to move the slide up or down in the list.
3. Type a name in the Slide show name box, and then click OK.
4. Repeat steps 1 through 3 to create more supporting custom shows with any slides in your presentation.
5. Create hyperlinks from the main show to the supporting shows.
How?
1. Select the text or object that you want to represent the hyperlink.
2. Click Insert Hyperlink .
3. Under Link to, click Place in This Document.
4. Do one of the following:
Link to a custom show
1. In the list, select the custom show you want to go to.
2. Click the Show and return check box.
Link to a location in the current presentation
In the list, select the slide you want to go to.
Tip
To see a preview of a custom show, select the name of the show in the Custom Shows dialog box, and then click Show.
See Also Free trial of the 2007 Microsoft Office system


trigger

Kích hoạt

Trước hết Hãy chuyển qua những thuật ngữ: một triggernhững thứ như một mục trên slide PowerPoint của bạn - nó có thể là một hình ảnh, hình dạng, một nút hoặc thậm chí có một đoạn văn hay hộp văn bản  — gây ra một hành động khi bạn nhấp vào nó. Các hành động có thể là một âm thanh, một bộ phim, hoặc một ảnh động (hoạt hình), chẳng hạn như văn bản trở thành có thể nhìn thấy được trên slide.

Đây là một ví dụ về một kích hoạt:

Chơi Demo

Trong phim hoạt hình này, hình ảnh này là kích hoạt. Nó thiết lập để khi bạn nhấp vào hình ảnh, danh sách dấu đầu dòng xuất hiện .

Một Sử dụng khác của một trigget là: bạn có thể tạo ra một tập các câu hỏi và câu trả lời trên một slide cho một sinh viên, và thiết lập các lựa chọn trả lời tạo ra những chỉ báo câu trả lời đúng hay sai. Ví dụ, trong một bài thuyết trình "Giới thiệu về lớp học của tôi", bạn có thể mời độc giả để làm cho dự đoán về bạn:

Cái nào là đúng? Vật nuôi trong nhà của tôi là:

1. Chú mèo tên là Garbo.

2. Con trăn Nam Mỹ tên là Elvis.

3. Con chồn sương tên là Ferdinand.

Bất cứ điều gì sinh viên nhấp chuột trả lời, bóng văn bản hoặc một bóng hình ảnh  tương ứng hiện lên, chẳng hạn như, "bạn đoán: mèo của tôi là một đàn mèo Garbo hơn Garbo." Hoặc, một âm thanh tắt đi đó làm cho câu trả lời sai hay đúng được làm rõ ràng.

Trigger giúp bạn có được một tương tác hai chiều với học sinh của bạn, mời họ đoán, cười, suy nghĩ về, tìm hiểu, tham gia vào các trò ngớ ngẩn, hoặc bất cứ điều gì.

Khái niệm cơ bản về Trigger:

Liên kết của các điểm về Trigger:

Bất cứ lúc nào bạn có một hiệu ứng hoạt hình, phim hoặc âm thanh trên một slide, bạn có thể thiết lập một kích hoạt cho nó. Hoặc, một cách khác để suy nghĩ về nó: bạn có không có quyền truy cập vào các tính năng gây nên trừ khi một trong những hiệu ứng là vào slide của bạn.

You must click a trigger directly (as opposed to just clicking the slide) for its related effects to play.
Try it out
The steps below tell you how to create an effect similar to what's shown in the slide sample above. Imagine that you're creating a slide for a presentation of teacher biographies. You need to set up a picture (presumably of the teacher) so that it triggers a little text biography when it's clicked.
Set up the slide
Start with a layout that combines a picture with text:
1. Start PowerPoint; it opens with a new, blank presentation. There's just one slide so far, as you see in the Slides tab on the left of the window.
2. Insert a new slide.
3. In the Slide Layout task pane, find a layout called Title, Content and Text, which has room for a picture on the left and a list on the right. (Rest the mouse pointer on the layout options to see ScreenTips that show you the names of the layouts.) Click that layout to apply it to the new slide.
Insert the trigger
For now, you'll just insert the item that will serve as the trigger — in this case, a picture or photo. Later, you'll make it behave like a trigger.
1. On the slide, in the left placeholder, insert a picture. (For the following effects and this layout, a picture with a vertical orientation works best.) Your method for doing this is up to you; the icons on the slide help you insert clip art or a picture from a file on your computer.
NOTE If you want more search options for clip art, use the Clip Art task pane in PowerPoint 2003 (Insert Clip Art task pane in PowerPoint 2002). On the Insert menu, click Picture, and then click Clip Art. Then, in the list under Results should be, you can search just for photographs. If the clip inserts into the middle of the slide, drag it into the lefthand pane.
2. Using the Text Box button on the Drawing toolbar, put a caption below the photo that says something like, "Click the photo for a bio."
3. Type the teacher's name in the title (top) placeholder on the slide.
Create an animation
Now apply an animation effect to text in a list. This effect is the action that the trigger will set off.
1. In the placeholder on the right side of the slide, type a bulleted list of points that tell something about the teacher.
2. Animate this text:
1. Open the Custom Animation task pane. (Quick way: Right-click the text on the slide, and then click Custom Animation.)
2. On the slide, click within the bulleted list of text.
3. In the task pane, use the Add Effect button to apply an Entrance effect, such as Color Typewriter.
On the slide, you should see consecutive numbers next to each bullet point, indicating that the bullets will play in sequence. In the task pane, the effect looks something like this:

The effect has been applied to each bulleted item (or paragraph) in the slide placeholder, but it's showing in a collapsed list in the task pane, so you only see the first bulleted item that has the effect. As indicated by the mouse icon, each bullet point will "play" (or appear) when you click the mouse.
3. Since this will be a self-guided presentation, it's best if the animation effects play automatically. To change how they start, in the task pane, click the arrow on the right of the effect, and then click Start After Previous.

On the slide, the numbers next to the text all become zeros. And in the task pane, there's now a clock icon next to the effect.
4. To see how this looks in a presentation, click the Slide Show button within the task pane. The bulleted list items play automatically in the presentation. (To return to normal view, press ESC.)
Hook up the trigger
Now you'll hook up the animation effect to the picture so that when you click the picture, the animation starts playing.
1. Looking at the effect again in the task pane, click the arrow on the right to display the drop-down menu, and then click Timing.
2. Click the Triggers button on the lower left.
3. Click Start effect on click of. You'll see a list that looks something like this:

The list shows the various items on the slide, starting with title text.
4. Select the art file that represents the picture you inserted. In the example above, it's the number j0178808[1], which is a file name for a piece of clip art. Then, click OK.
The animation is now set to play when you click the photo, and the effect looks like this in the task pane:

The main difference is that the effect is now under a trigger bar (the bar that says Trigger: j0178808[1]), and the bar shows you what the trigger is (the picture's file name). On the slide, there's a hand icon next to each bullet, indicating that each bulleted item has a triggered effect.
5. Check this out in Slide Show view. In the presentation, point to the photo; the pointer becomes a hand. Click the photo, and the text effect plays.
Spice up the action
To make more happen when you click the trigger, animate the picture and add a sound.
1. On the slide, click the picture, and use the Add Effect button to add an Emphasis effect. Choose the Grow/Shrink effect.

In the task pane, this effect shows at the top of the list, above the trigger bar. To make it play as part of the triggered sequence, drag it under the trigger bar, above the text effect that's already there. The effect sequence looks like this:

2. To control how much the picture grows, click the emphasis effect that you just moved into the list, click the arrow on its right to display its menu, and then click Effect Options.

3. Click the arrow next to the Size box. Next to Custom, change 150% to 125%, press ENTER, and then click OK.
4. Add a sound effect by applying one that's built in to the text effect you added earlier (Color Typewriter, the entrance effect that has the ascending stars as an icon):
1. Click the text effect in the list. (You still see just the top item with the rest collapsed.)
2. Click the arrow on its right, and then click Effect Options.
3. In the Sound list, select the Typewriter sound.
4. Click OK.
Note The bulleted list items might play faster than you'd like (the default time is 0.08 seconds). With the Color Typewriter text effect selected in the task pane, if you look at the Speed box above it and click the box's arrow, you'll see other timing options (Fast, Very Fast, and so on). However, these might play it too slowly. To set a specific number of seconds for the list to play, click the arrow on the Color Typewriter effect, click Timing, and in the Speed box on the Timing tab, change the number to something a few seconds longer. That will slow down playing time slightly.
Go for it
You've got the essentials for giving students an interactive experience with PowerPoint. They'll appreciate the results.


Play sounds and movies
This article discusses some of the options for playing music, sounds, and movies (also called videos) in PowerPoint 2003.
The most popular ways to play sounds and movies are:
Automatically when you show the slide, or only when you click the sound or movie image
Across several slides sequentially
Continuously throughout the whole slide show
At full-screen size (for movies)
Play sounds and movies Automatically vs. play When Clicked
When you insert a sound or movie, you're prompted with a message asking how you want the sound or movie to start: automatically (Automatically) or when you click the sound or movie frame (When Clicked).
Here are details about the results of each choice, as well as how you can change this setting in the Custom Animation task pane if you later change your mind.
Start the sound or movie when you show the slide
Click Automatically.
The sound or movie plays automatically when you show the slide unless there are other media effects on the slide. If there are other effects, such as an animation, the sound or movie plays after that effect.
NOTE For movies only: You can pause a movie while it's playing by clicking it. To continue playing the movie, click it again.
How the play and pause effects work with movies that start automatically
When you insert a movie and then choose Automatically, two effects are added to the Custom Animation task pane: a pause effect and a play effect. Without the pause effect, the movie would restart from the beginning each time you clicked it instead of pausing and then continuing when you clicked again.
After you insert a movie, you see something similar to the following image in the Custom Animation task pane.

In this image, the first line (with a "0") is the play effect. It represents the automatic start. The clock icon is the symbol for the start setting called Start After Previous. This setting enables your movie to play automatically after the slide is displayed or after another effect plays (if there is one). The triangle icon (similar to the symbol on the play button of a VCR or DVD player) is the indicator for the play effect.
The second line is the "trigger bar," and below that (the line with a "1") is the pause effect. You see a mouse icon and a double-bar symbol, (similar to the pause symbol on a VCR or DVD player). This effect is added whether the movie starts automatically or by a mouse click. Its position under the trigger bar indicates that you have to specifically click the movie (as opposed to clicking anywhere on the slide) to start the movie.
Switch from Automatic to When Clicked
Start the sound or movie when you click it on the slide
Click When Clicked.
This setting is known as a trigger, because you have to click something specific (as opposed to just clicking the slide) to play the sound or movie.
NOTE When you insert a sound, a play trigger effect is added, but when you insert a movie, a pause trigger effect is added. In a slide show, you click the movie frame to pause it and click again to resume it.
How the pause effect works with movies that start when clicked
After you insert a movie, you see something similar to the following image in the Custom Animation task pane.

Unlike what happens when you choose to start a movie automatically, the only effect that is applied when you choose to start the movie by clicking it is the pause effect — the line with the mouse icon and the double-bar (pause) symbol.
Switch from When Clicked to Automatic
Sounds greater than 100 KB
By default, if sounds are greater than 100 kilobytes (KB) in size, they are linked to your file rather than embedded in it. Only *.wav (waveform audio data) sound files can be embedded — all other media file types are linked.
You can change the default for *.wav files to be more or less than 100 KB by changing the number in the Link sounds with file size greater than box on the General tab (Tools menu, Options command). Although you can raise the maximum size to 50,000 KB, remember that extra size makes the file size of your overall presentation bigger.
Changes made to this setting are not retroactive, so any sound files that were linked before you increased this threshold must be removed and reinserted into your presentation if you want them to be embedded. Correspondingly, any sound files that were embedded before you reduced the threshold must be removed and reinserted into the presentation if you want them to be linked.
Also remember, when your presentation contains linked files, you must copy the linked files as well as the presentation if you give the presentation by using another computer.
Find more information about embedded and linked sound files in PowerPoint.
Play sounds and movies across several slides
You may want the sound or movie that you inserted in a presentation to continue to play when you advance to the next slide.
To do this, you need to specify when the movie or sound should stop playing. Otherwise, it will stop the next time you click the slide for any reason.
NOTE You must have a play effect to do the following procedure. If you already inserted the sound or movie and chose When Clicked when prompted, you can switch from When Clicked to Automatic to add a play effect.
1. Insert the sound or movie if you have not already done so.
2. Right-click the sound icon or movie frame, and on the shortcut menu, click Custom Animation.
3. On the line that represents the sound or movie play effect (the line with the triangle), click the arrow, and then click Effect Options.
4. To keep the sound or movie playing for several slides, under Stop playing, click After, and then set the total number of slides that the file should play across.
NOTE The procedure above plays the sound or movie only once for the length of the file. It won't loop the sound or movie continuously. To play a sound or movie repeatedly, see the next section.
Play movies and sounds continuously throughout the whole slide show
You may want the sound or movie to play for the duration of the slide show or to keep playing until you stop it. If the length of the sound or movie file isn't long enough for continuous play during a slide show, you can set the sound or movie to loop.
1. Insert the sound or movie if you have not already done so.
2. Right-click the sound icon or movie frame, and on the shortcut menu, click Edit Sound Object or Edit Movie Object.
3. In the Sound Options or Movie Options dialog box, select the Loop until stopped check box to repeat the sound or movie continuously.
Play movies full-screen
The full-screen option plays the movie as if it were its own screen, so it doesn't appear to be playing on a slide. If your movie file looks good when it is enlarged, you'll want to use this option. Depending on the resolution of your original movie file, it might not look good playing full-screen. You'll always want to preview your movie with this setting, so that you can undo full-screen mode if the film looks blurry.
1. Insert the movie if you have not already done so.
2. Right-click the movie object on the slide, and on the shortcut menu, click Edit Movie Object.
2. In the Movie Options dialog box, under Display options, select the Zoom to full screen check box, and then click OK.


For in-depth information, read Insert a movie (or video) into PowerPoint 2003 and run it full screen written by Mary Feil-Jacobs, who works on executive presentations for Microsoft corporate events.
Tips
Hide the sound icon or movie frame In the Edit Sound Object or Edit Movie Object dialog box, you can select the Hide sound icon during slide show check box or Hide while not playing check box to make the sound icon or movie frame invisible in a slide show. Use this option only if you set the sound or movie to play automatically, or if you created some other kind of control, such as an action button, to click to play the sound or movie. Note that the sound icon or movie frame is always visible in normal view.
You can preview sound in your presentation.
For in-depth training on playing sounds and movies in PowerPoint 2003, see Playing sound and Playing movies.
Portions of this article were excerpted from Training on Microsoft Office Online.
Did this article help you?


Send a presentatioentn as an attachm

The recipient of an e-mail message may not receive an attachment depending on the attachment file type. For example, program file type (.exe) attachments are blocked by Microsoft Outlook. The security level of file types is, in some cases, set by the e-mail server administrator. Make sure to provide an alternative method for recipients to access the attachment.
PowerPoint file extensions, such as Presentation (*.ppt), PowerPoint Show(*.pps), PowerPoint Add-In (*.ppa), and Design Template (*.pot) are not blocked by Outlook. If you have problems sending your presentation, or for more information on sending e-mail, see Microsoft Outlook 2003 Help or the Help for your e-mail program.
Before sending a presentation, you should verify that the recipients of your presentation can receive an attachment through their e-mail system.
1. Open or create the presentation you want to send as an attachment.
2. On the File menu, point to Send To, and then click Mail Recipient (as Attachment).
3. In the To and Cc boxes, enter recipient names, and add any additional information or select any additional options you want.
NOTES
To have your presentation start automatically when the recipient opens the attachment, save it as a PowerPoint Show (.pps).
If your PowerPoint file is too large to e-mail, try reducing the file size of the pictures used and embedding only font characters used in your presentation to minimize the file size.
If your recipient doesn't have PowerPoint installed, they can download and use the Microsoft Office PowerPoint 2003 Viewer to look at your presentation and send you comments in e-mail.
You cannot use PowerPoint to send an .htm file in e-mail because your associated files cannot be added in this way. You can save the presentation as a first and then send it, publish the file to the Web, or copy it to a shared location, such as a network file server.
In PowerPoint, you can only send an entire presentation as an attachment in e-mail — you can't send a single slide or the text on a slide for review. You can, however, send individual slides to Microsoft Word and then send the Word document as an attachment.